
 On this thermostat, the labels for conventional systems are on the inside of the connectors and the labels for heat pump systems are on the outside of the connectors.
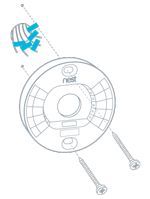
How do I install the Haven Learning Thermostat on different wall surfaces?
The Haven Learning Thermostat comes with everything you’ll need to install it on almost any wall surface.
Use the included screws to mount your Haven Thermostat to plain drywall. For panelling, plaster-and-lath, or if there is a stud behind the thermostat, pre-drill a hole using a 3/32” bit first.
If you don't want to patch, spackle and paint, use the optional trim kit in the box to cover holes left by the old thermostat.
- Drywall or sheetrock or plasterboard:
Follow the Installation guide instructions to mount the Nest Thermostat on your wall. Typically, you can simply pull the labeled wires through the center hole of the base, level the base and screw it in. In some cases (like if there is a stud in the wall behind the thermostat) we recommend you pre-drill holes using a 3/32” drill bit. - Wallpaper:
Follow the Installation guide instructions. If you like, pre-drill holes using a 3/32” drill bit. - Wood:
Follow the Installation guide instructions. If you like, pre-drill holes using a 3/32” drill bit. - Plaster
If you’re installing on an older plaster-and-lath wall, you should pre-drill holes that penetrate the wooden lath using a 3/32” drill bit. Use the longest Nest screws to get a secure grip through the plaster and into the lath. - Stone, brick, concrete, or marble:
To install your Nest Thermostat on stone, brick, marble, or concrete, you’ll need a masonry drill bit and a drill to drill the holes. You may also need special masonry screws. We recommend that you contact a professional for assistance. - Electrical Box:
If your wall is an uncommon material (like stone), it is likely that your old thermostat was mounted on an electrical box. If so, simply use the electrical box configuration in the Nest Thermostat's optional mounting kit and follow the instructions.
COMMON PROBLEM 3:
The Haven Learning Thermostat will not turn on after installation
The Haven Learning Thermostat will turn on automatically once it connects to your heating and cooling system and the power has been turned back on. If your Nest Thermostat doesn’t turn on as expected, try the steps below to troubleshoot.
There are a few possible reasons why the Nest Learning Thermostat isn’t turning on as expected. Below are detailed descriptions of each possible reason and suggestions for how to get them fixed. But you should try our Troubleshooting tool. It’ll walk you through isolating the problem and getting it fixed right now.
1) Did you turn the power back on to your heating and cooling system?
Sometimes breakers can be tricky. You may think you flipped it back on, but it didn’t flip all the way.
The best thing to do is to turn the breaker or power switch to your heating and cooling system off and back on again. If your Nest Thermostat is starting back up when you get back (it can take a few seconds), you’ll know that was the problem.
2) Is there a flashing red light on the display?
A small, flashing red light on the Nest Thermostat display means that the battery is low and is currently being charged.
Once charging is complete, your Nest Thermostat will turn on.
Why is there a flashing red light on the Nest display?
3) Is there a flashing green light on the display?
A small, flashing green light on the Nest Thermostat display means that the Nest Thermostat is updating software or when the display and the base are communicating.
If this continues for more than a minute or two, see the article below for more troubleshooting.
Why is there a flashing green light on the Nest display?
4) Is the Nest Thermostat display fully connected to the base?
 The Nest Thermostat won’t turn on until the display is connected to the base. If the wires connected are bundled up in the center of the base, they may be preventing the display from getting a solid connection.
Try removing the display and pushing the wires back into the wall as far as you can. When you’re done, there should not be any wires extending beyond the level on the base. Reconnect the display. If that was the issue, the Nest Thermostat will power on.
5) Are the wires connected correctly?
Important note: Be sure to turn off the power to your heating and cooling system before you try any troubleshooting steps that involve removing wires. This will prevent your system from blowing a fuse.
Incorrect wiring may prevent the Nest Thermostat from turning on. Before you check your wires, turn the power to your heating and cooling system off. Next, remove the Nest Thermostat display and take a look at the wiring to check the following:
|
Do you have a common wire in the C connector? |
If you have a common wire connected to the C connector, start by removing it and turning the power back on. If your Nest Thermostat starts up, that means that the common wire that was installed in your old thermostat was not delivering voltage, either because it wasn’t hooked up or because of corrosion in the wire. You can just continue without the common wire installed; the Nest Thermostat usually doesn’t need it. |
|
Do you have a millivolt system? |
If you have only two wires connected to the Nest Thermostat base, there is a chance that your system is a millivolt system. This means it isn’t providing any power to the Nest Learning Thermostat. The Nest Thermostat only works with low voltage systems, so millivolt systems aren’t compatible with the Nest Thermostat. Once you confirm that your system is low voltage, move on to the next step. |
|
Are the wires inserted correctly? |
The exposed part of the wire should be ⅜” (1 cm) and should be straight. You should clip and re-strip any crooked or mangled wires. When you reconnect the wires, simply push down on the connector, insert the wire all the way, and then release. If the connector button doesn’t stay down, the wire is not fully inserted. |
 The Nest Thermostat won’t start up if the wires aren’t correctly inserted into the connectors. To check, make sure the power to your heating and cooling system is off and then remove, inspect, and replace each wire one at a time (so that you remember where they all go).
6) What else can I do?
If you have the correct USB cable, you can start up the Nest Thermostat display by connecting it to a USB port. Once this is done, the Nest Thermostat can help you troubleshoot what might be wrong with the wiring during setup.
What you’ll need:
- Mini-USB cable for 1st generation Nest Learning Thermostat
- Micro-USB cable for 2nd generation Nest Learning Thermostat
- A computer with a powered USB port or USB power adapter
Here’s how:
- Remove the Nest Thermostat display from the base.
- On the back of the display, you’ll see a USB connector.
- Plug the small end of the USB cable into the Nest Thermostat and the other into a power source (like the USB port on your computer or a USB power adapter).
Once the screen lights up and you see a message asking you to attach the Nest Learning Thermostat to the base, unplug the USB cable from the back of the display. Now reattach the Nest Thermostat display to the base. From there, follow the onscreen instructions.
If there is a problem with your wiring, your Nest Thermostat will provide details and direct you to troubleshooting tools to get the problem resolved.
7) Does your old thermostat still work?
The next step is to reattach your old thermostat. Turn the power back on and verify that your heating and cooling system is working properly. If your heating and cooling system works with your old thermostat, use our Troubleshooting tool to help isolate and fix the problem.
If your heating and cooling system doesn’t work with your old thermostat either, there is probably an issue with the electrical supply to your heating and cooling system. It could be a blown fuse on the furnace or a bad circuit breaker and we’d recommend contacting a Haven Certified Professional.


